How to Take and Submit Photos for KlearFX Clear Aligner Planning
Getting started with KlearFX clear aligner treatment involves submitting precise and high-quality photographs of your teeth. These images help in creating a customized treatment plan tailored to your patient’s dental needs. Follow this step-by-step guide to ensure your photos are perfect for evaluation.
Before you start, make sure you have:
- A digital camera or smartphone with a high-resolution camera
- Two mouth mirrors or spoons (to help hold back your cheeks)
- A clean, well-lit space with a plain background
- Someone to assist you, as some shots may be difficult to capture by yourself
Step 2: Prepare Your Environment
- Lighting: Natural light works best. If possible, take your photos near a window or in a well-lit room. Avoid using flash as it can create shadows and reflections.
- Background: A plain, neutral background (such as a white or light-colored wall) helps keep the focus on your teeth.
Step 3: Clean Teeth
Brush and floss your patient’s teeth thoroughly before taking the photos. Clean teeth ensure that the doctors can see your dental structures clearly without distractions from food particles or plaque.
Step 4: Take the Photos
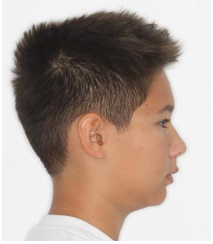
You will need to capture a series of images from different angles. Here’s how to do it:
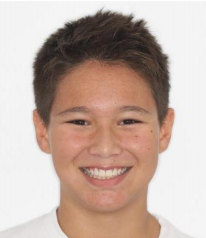
Front View:
- Stand in front of the camera.
- Smile naturally, showing your teeth.
- Ensure your lips are out of the way and your teeth are fully visible.
- Take a photo straight on.
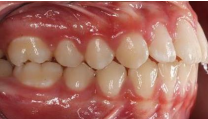
Right Side View:
- Use a mirror or spoon to retract your left cheek.
- Bite down normally, ensuring your back teeth are touching.
- Take a photo of the right side of your teeth.
Left Side View:
- Use a mirror or spoon to retract your right cheek.
- Bite down normally, ensuring the back teeth are touching.
- Take a photo of the left side of the teeth.
Upper Arch View:
- Tilt head back.
- Open the mouth wide.
- Hold a mirror in your patient’s mouth to reflect the upper teeth or have your assistant take the photo from above.
- Take a photo showing all upper teeth and the roof of your patient’s mouth.
Lower Arch View:
- Tilt head down.
- Open mouth wide.
- Hold a mirror in your patient’s mouth to reflect the lower teeth or have your assistant take the photo from below.
- Take a photo showing all lower teeth and the floor of your mouth.
Bite Views:
- Closed Bite (Natural bite): Bite down normally and take a photo showing your patient’s natural bite from the front.
- Open Bite (Teeth apart): Open your patient’s mouth slightly and take a photo showing the gap between the upper and lower teeth.
Step 5: Review and Select Photos
Review the photos to ensure they are clear, well-lit, and show all required angles without blurriness. If any photo is unclear, retake it. High-quality images are crucial for accurate aligner planning.
Step 6: Submit Your Photos
Once you have all the necessary photos, upload them to the KlearFX submission portal. Ensure you follow any specific instructions provided by KlearFX for naming or categorizing your files.
Additional Tips
- Stay Still: Hold still while taking the photos to avoid any motion blur.
- Clean Mirrors: Ensure any mirrors used are clean to avoid smudges that could obscure the view of your teeth.
By following these steps carefully, you will provide KlearFX with the best possible images to create an effective and personalized clear aligner treatment plan. High-quality photos enable the orthodontist to understand your dental structure and needs, leading to a better treatment outcome.


